


Do you struggle with keeping all of your teacher stuff organized? I don’t blame you. You have a million things on your mind, so the last thing you want to do is think about organization.
That’s why I did the thinking for you!
I’m sharing with you my tried-and-true teacher organization tips that have helped me streamline my classroom and de-clutter the mess!
Teacher Organization Tip #1
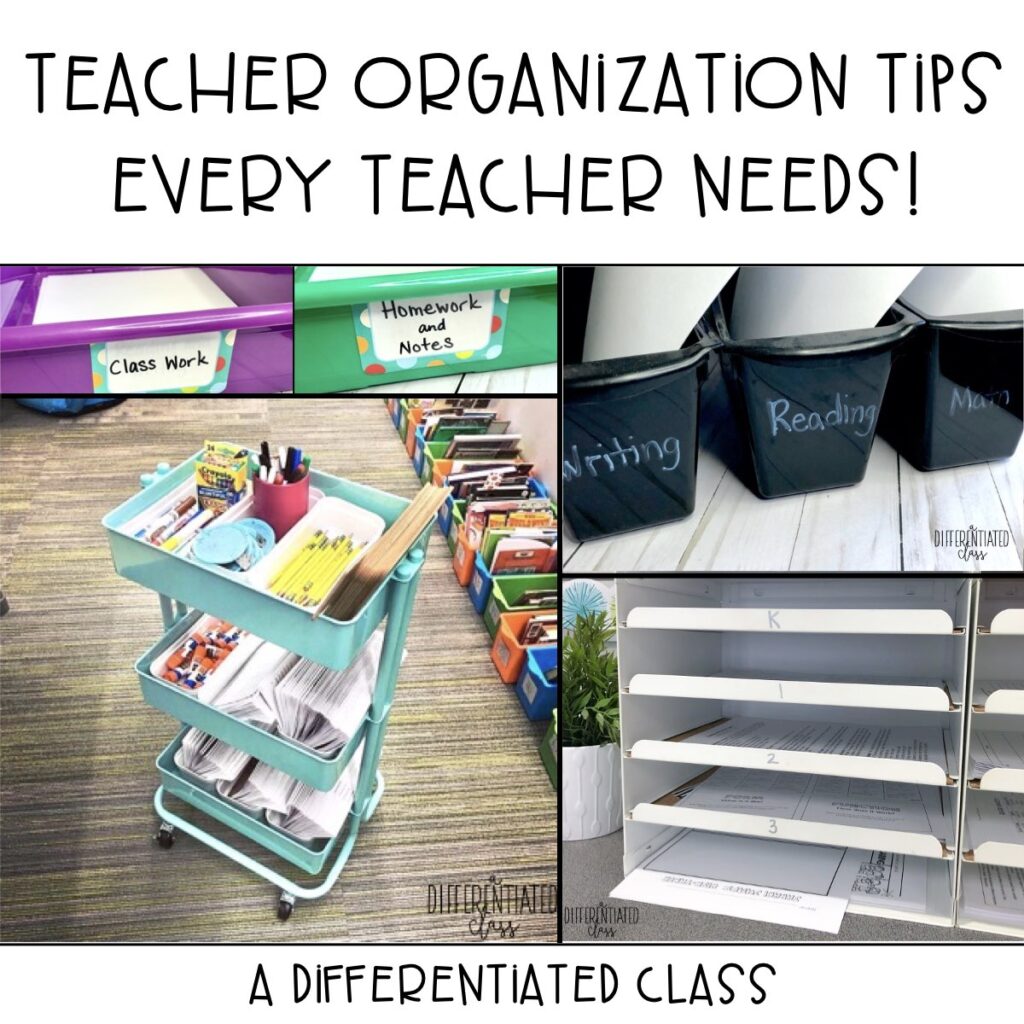
Get a teacher cart.
No joke… This teacher cart CHANGED MY LIFE.

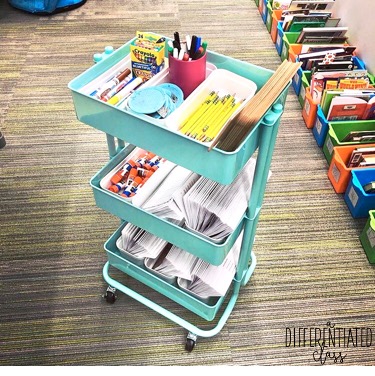
First of all, it’s cute. It rolls everywhere. And it’s the perfect size to tuck into small spaces!
I got both the cart and the white bins inside the cart from Michael’s. Click here to see the teacher cart. Unfortunately, I couldn’t find the white bins on their website, so I don’t know if they carry these exact ones anymore. 🙁 I did see these ones that looked similar, though.
Different teachers use their teacher carts for various purposes. I use my teacher cart to hold my small group supplies. Here’s what I keep on it:
- Extra pencils
- Miniature white boards (from Really Good Stuff)
- Face pads to use as white board erasers (from Dollar Tree)
- Dry erase markers
- Markers
- Crayons
- Glue sticks
- The other bins are holding my guided reading books for each group
When I need it, all I have to do is roll it on over to my small group table!
In fact, my teacher cart was even featured in the blog post “41 Instagram-Worthy Teaching Hacks” on the We Are Teachers website!! That’s how useful it is! Want to see their other 40 teaching hacks? Click here!
Teacher Organization Tip #2
Get a durable teacher paper organizer.
I don’t really know what it’s officially called, but you know what I’m talking about! The things with all the shelves where you can stack your papers!
This will help keep your teacher desk organized and *hopefully* clear of clutter!
Here’s what I use…

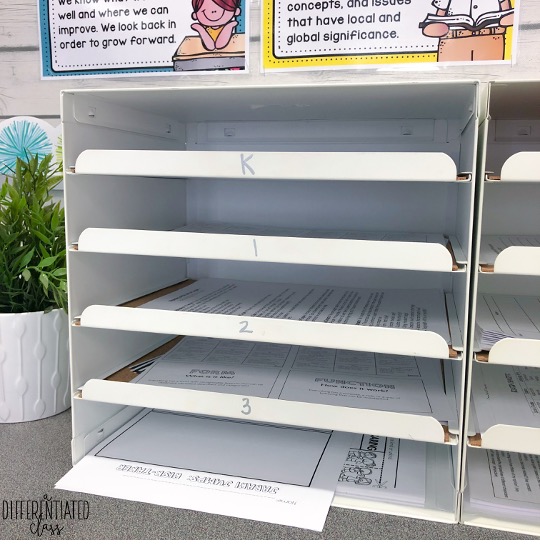
I got it from IKEA and I love it!! You can click the picture above to check it out (no affiliate link… just sharing what I love!).
It’s made of metal, so it’s super durable!! And the shelves slide out so you can easily grab whatever papers are in there. As you can see in the picture, I actually have two of them… Side by side.
I’m in a new role now, so this picture shows how I’m using it to organize the various papers and activities for each grade.
In my own classroom, I used it very differently. Here’s how I labeled my shelves:
- Work too be graded
- Papers to be copied
- Papers to be filed
- Extra copies
- Important papers
But play around with it and see what works for you!
Teacher Organization Tip #3
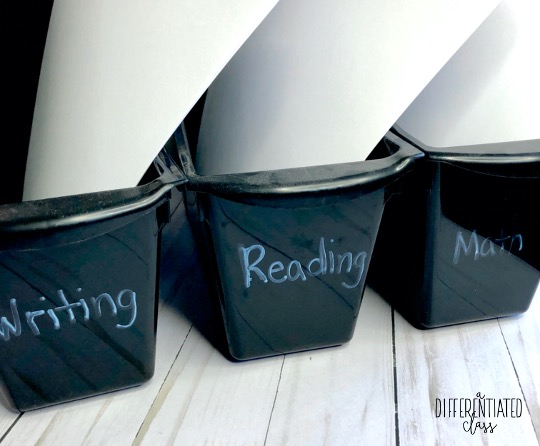
Decide how you want to store your activities and lessons for the week.
This one took me some time to figure out! I played around with all kinds of different set-ups for how to organize my activities for the week!
Ultimately, I decided on the ever-so-popular method of storing my activities for the week in book bins. (I got these book bins from Amazon… Click the picture below to see the ones I bought!)

However, what I did differently is that I didn’t organize the activities by the day of the week (i.e. Monday, Tuesday, etc.). That was too limiting for me. If I don’t get to an activity on Monday, should I move it to the Tuesday bin? What if I don’t get to it until Friday? Will I remember which bin it’s in?
Nope.
So, here’s what works for me… I organize my weekly activities by SUBJECT AREA. That way I always know where to look!
I label my bins with these categories…
- Reading
- Math
- Writing (and word study)
- Social studies/science
- Miscellaneous (for the random activities that didn’t really fit with any particular subject)
Organizing my lessons and activities this way made my life so much easier!
Teacher Organization Tip #4
Have a place for “extra” supplies.
This doesn’t necessarily mean that you need to go out and buy a bunch of extra crayons, scissors, etc.
It just means that when a student ends up with an extra pair of scissors, for example, because they grabbed someone else’s by mistake, they have a place to put them.
Or, if you find a few crayons on the ground after cleaning up from an activity, you have a place to put them.
Then, when a student realizes they’re missing their scissors or their red crayon, they know where to look! The “extras” drawer or bin!

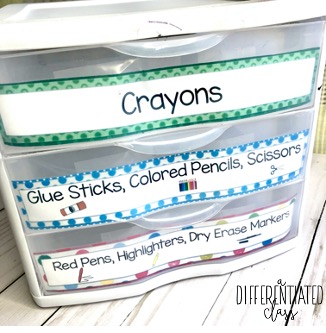
This is sooo helpful for a number of reasons!
- You don’t have to be the “keeper” of all the misfit supplies.
- The kids don’t have to come to you every time they can’t find something… They look in the “extras” bin first.
- It helps build responsibility… If a student finds a crayon, they can put it in the extras bin instead of ignoring it because it’s not theirs. (At least that’s the idea… Does that always happen? Of course not. But we can dream.)
Teacher Organization Tip #5
Have a place for your students to turn in their classwork and their homework.
Because if you don’t, the piles of papers will consume you!
Some teachers use hanging files. I use plastic bins.

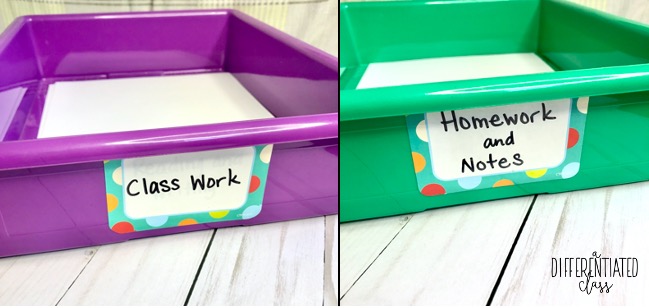
Why do I use plastic bins, you ask? A few reasons…
- Plastic bins are simple. One place for classwork, one place for homework. I don’t need to go digging through individual files to get to all of the kids’ work.
- They’re portable. For example, I can take the bin with me to the assembly and start looking at their work.
- They’re cheap. I got these bins in the discount section at Target several years back. I think they were like $3 each.
Whichever you choose, be consistent with it! If the kids always know where to turn in their work, there’ll be fewer questions and more organization!
Teacher Organization Tip #6
Have a way to organize games and other activities.
I LOVE using games for a variety of activities… Centers, whole-group practice with a skill, and for fast-finishers. (I mean, what’s easier than saying, “Go grab a math or spelling game!” when a student finishes their work early??)
Because I use games so often, I need a way to organize them so that they’re easy for both me and the students to access!
For *most* of my games, I use the same plastic drawers that I use for the extras supplies. I just label each drawer with the name of the game.

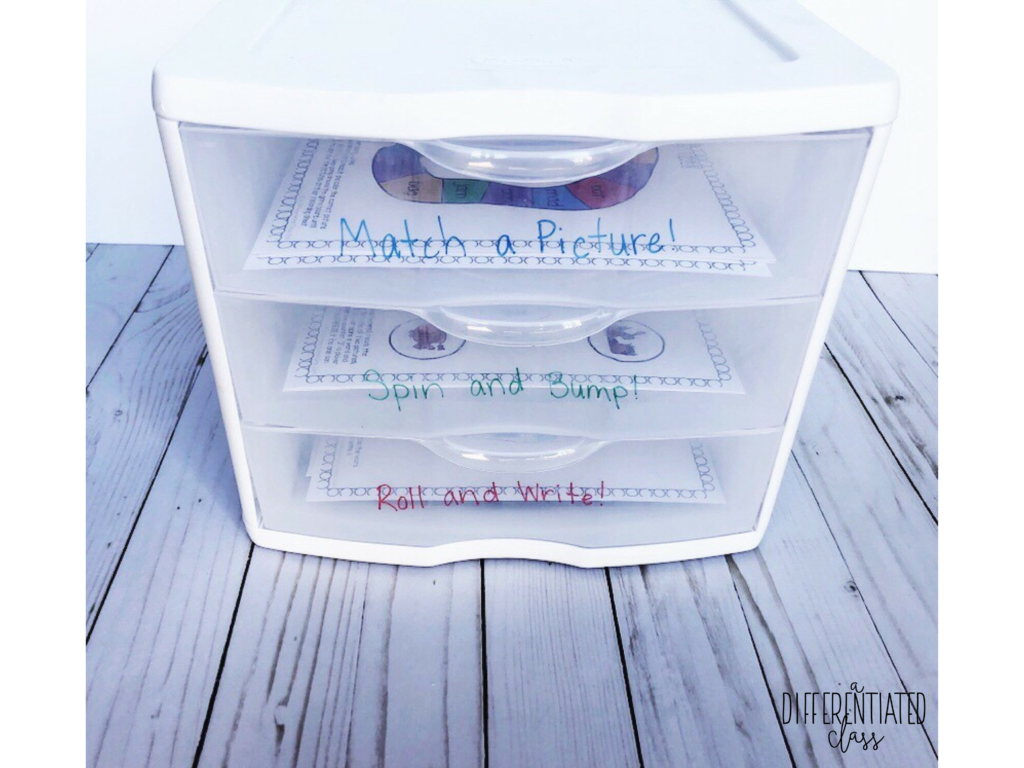
These games are from my CVC Games resource! I have a blog post all about what’s included with these games, so click here if you’d like to read it!
The other way I organize games is with zipper pouches. These are great for card games and anything that involves small pieces!
Teacher Organization Tip #7
Have a place to store student files.
Believe me… You’re going to want all of your students’ work in one place when it comes time to do parent-teacher conferences and report cards!
I used to use a binder system where I put each student’s work into big binders with one for each subject area. The problem with this was that big binders are not easily portable. So if I wanted to work on report cards at home, I had to bring home 3-4 huge binders full of stuff! The other problem is that I had to flip through 3-4 binders in order to complete each student’s report cards. Not fun.
So instead, I started using this portable hanging file bin. I don’t remember where I bought this one, but I’m sure all the usual places carry them.

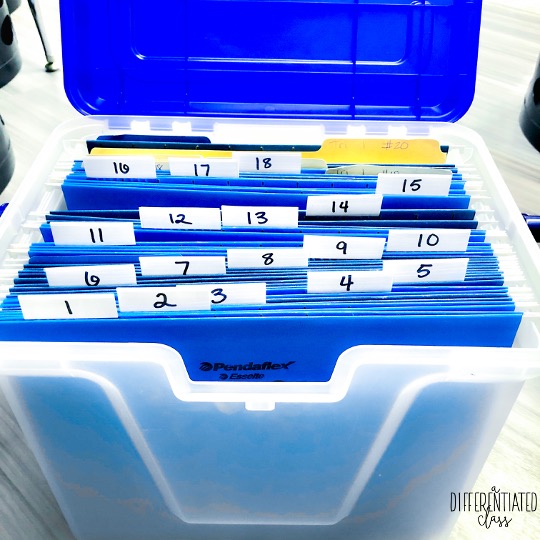
Why the hanging files work better…
Is this still a big, bulky to have to take home with me if I want to work from home? Sure. But at least it’s only ONE big, bulky thing instead of many!
Plus, this way I can easily pull their work out to have in front of me for parent-teacher conferences. With the binder system, I’d have to flip through a bunch of different binders to collect all of their work.
To make it even MORE organized, I kept 3 folders inside each hanging file– one for each trimester. So when it was time for trimester two conferences, I only had to pull out the trimester two folder.
And in case you didn’t already notice, I labeled all of the hanging files with student numbers!! That way, I don’t have to change out the labels every year. I can just re-use them.
*By the way, using student numbers is one of the time-saving tips I talk about in my blog post, “Time-Saving Tips for Teachers.” If you want to read the other tips, click here!!
I hope these teacher organization tips have helped you de-clutter and reduce the mess!
Comment below and tell me which tip (or tips) you have implemented in your classroom!!
And don’t forget to save this post on Pinterest for future reference!!